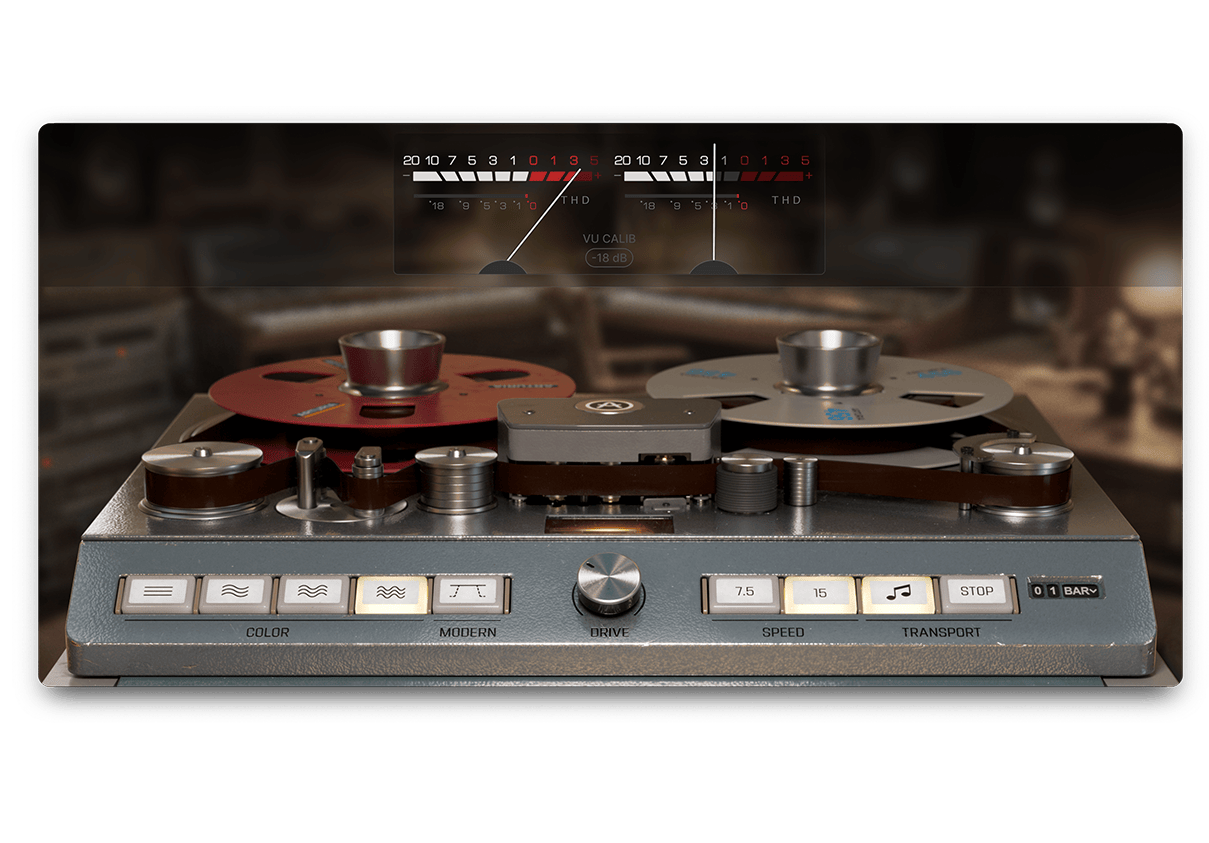
Tape J-37
Effet de studio à lampes
1. Téléchargez et installez l’Arturia Software Center (ASC)
L’Arturia Software Center (ASC) vous sert à activer, installer et mettre à jour vos instruments virtuels d’Arturia sur vos ordinateurs.
Vous pourrez accéder aux logiciels que vous possédez, ainsi qu’aux versions d’essai des autres plug-ins d’Arturia.
2. Connectez-vous à l’Arturia Software Center

Saisissez la même adresse e-mail et le même mot de passe que pour votre compte My Arturia. Vous pourrez alors retrouver votre licence de produit dans le panneau principal.
Si vous ne possédez pas de compte My Arturia, cliquez sur « Créer un compte » et suivez les instructions.
Si vous utilisez un ordinateur hors ligne, veuillez suivre la procédure décrite dans ce cet article.
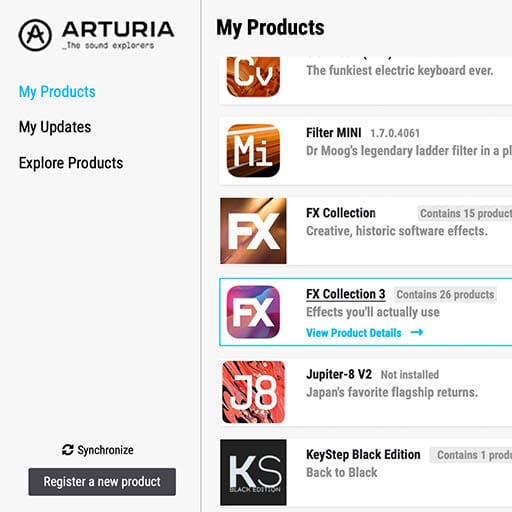
Si vous avez acheté votre licence logicielle sur le site Internet d’Arturia, elle sera automatiquement enregistrée dans votre compte. Sinon, cliquez sur le bouton « Enregistrer un nouveau produit » en haut de la fenêtre principale.
3. Installez et activez votre produit dans l'ASC

Trouvez votre logiciel dans la liste et cliquez sur le bouton « Install » pour lancer le processus d’installation en tâche de fond.
Il vous sera demandé de définir les dossiers de destination lors de la première utilisation.
Votre produit restera en mode démo jusqu’à ce qu’il soit activé. Pour ce faire, cliquez sur le bouton « Activer ». Votre tout nouvel effet sera alors activé.
Vous pouvez dorénavant l’utiliser sans restriction sur un maximum de cinq ordinateurs simultanés. Pour ce faire, répétez cette opération sur vos autres ordinateurs.
4. Lancez votre plug-in
Votre produit n'est pas disponible en version logicielle autonome.
Il doit être utilisé au sein d'un DAW (station de travail audionumérique).
Cliquez sur les icônes pour découvrir comment sélectionner et utiliser votre nouvel effet dans les principaux DAW :
Explorez, expérimentez, profitez !

Ableton Live

Bitwig

Cubase

FL Studio

Logic Pro X

Pro Tools

Studio One

Digital Performer

Pour Ableton Live
1/ Ouvrez le navigateur et cliquez sur la section « Plug-ins ».
2/ Choisissez l’effet virtuel que vous souhaitez dans le dossier VST ou Audio Unit*.
3/ Glissez-le sur votre piste ou votre retour d’effet.
Tape J-37
Tutoriels
Follow these step by step overview videos to get to grips with how Tape J-37 works.
Tutoriels | Tutorial | Tape J-37 | Overview
Lena takes you through the core features of Tape J-37, from its versatile tape color profiles to the dynamic drive control. We also get an introduction to its advanced controls, that add depth and character to your sound and unlock the creative potential of this iconic all-tube tape recorder.

Encore besoin d’aide ?
Notre équipe d’assistance sera ravie de vous aider si vous avez des questions concernant l’utilisation des instruments d’Arturia. Vous pouvez la contacter à partir de cette page :
Demandez de l’aide