Quick Start
This page will guide you through the few steps to get started with your product.
1. Download & install the Arturia Software Center (ASC)
The Arturia Software Center (aka ASC) lets you activate, install and update your Arturia virtual instruments on your computers.
It will let you access the software you own as well as demos of the other titles in the Arturia catalog.
2. Log into the Arturia Software Center
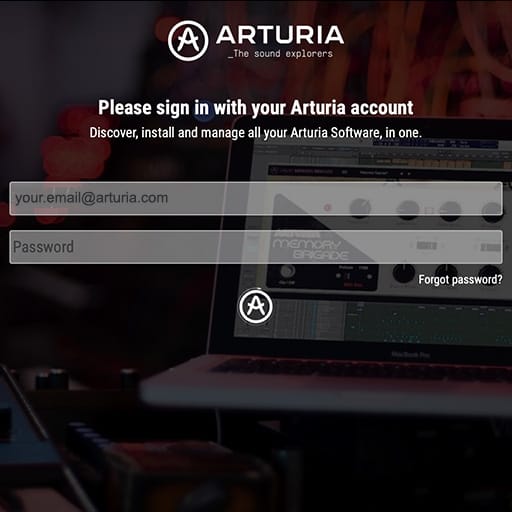
Enter the same email address and password as for your My Arturia account.
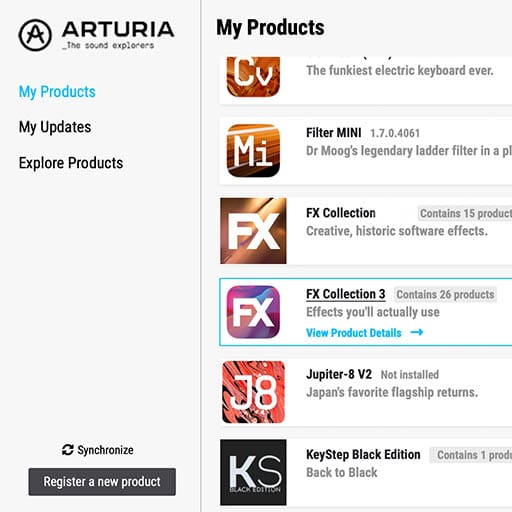
You will then be able to find your Product License on the main panel.
If you don’t have a My Arturia account, click on create account and follow the process to create one.
If you're using an offline computer, please follow the process described in this article
If you have purchased your software license on the Arturia website, it has been automatically registered into your account. Otherwise click on the button “Register a new product” on top of the main window.
3. Install and Activate your product through the ASC
Look for your product in the list and click on the “Install” button to launch the silent installation process.
You will be asked to define the destination folders on the first time.
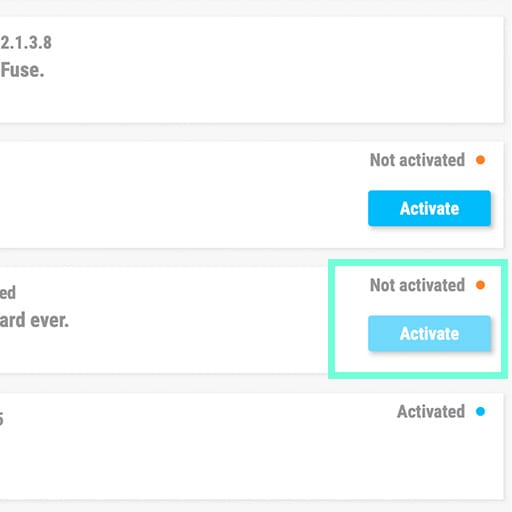
Your product will remain in demo mode until it is activated.
To do so click on the “Activate” button. Your brand new effect will now be activated.
You are now able to use it without restriction on up to 5 different computers simultaneously. To do that, repeat this operation on your other computers.
4. Lancer votre produit
Votre produit n’est pas disponible en tant que logiciel autonome.
Vous devez utiliser un DAW (Station de Travail Audio Numérique) pour vous servir du logiciel.
Cliquez sur les icônes ci-dessous pour comprendre comment utiliser votre nouvel effet dans les DAW les plus utilisés :
Découvrez, expérimentez, et surtout, amusez-vous !
 ABLETON LIVE
 BITWIG
 CUBASE
 FL STUDIO
 LOGIC PRO X
 PRO TOOLS
 STUDIO ONE
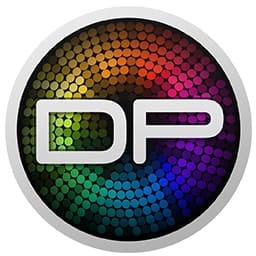 Digital Performer
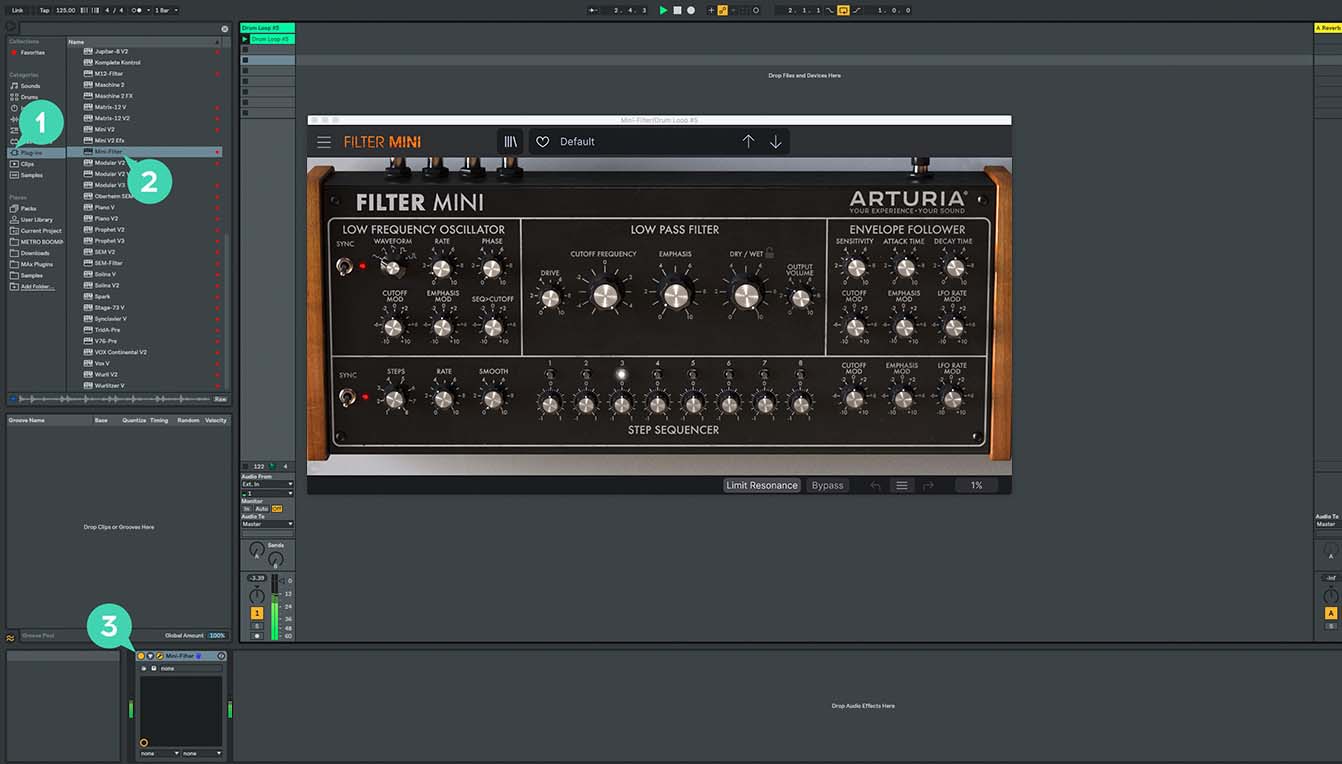
For Ableton Live
1/ Open the Live browser, and click on the 'Plug-ins' section.
2/ In the VST or Audio Unit* folder, browse the virtual effect of your choice.
3/ Drag & drop it in your track or FX return.

For Bitwig
1/ In Bitwig browser, select the devices section and click on the category tab.
2/ Select the Arturia category.
3/ On the bottom of the browser will appear the available Arturia devices.
4/ Drag & drop the virtual effect on your track.
For Cubase
1/ Select a track
2/ In the Inspector, open the Audio Insert tab
3/ Click on an empty slot and select the virtual effect of your choice
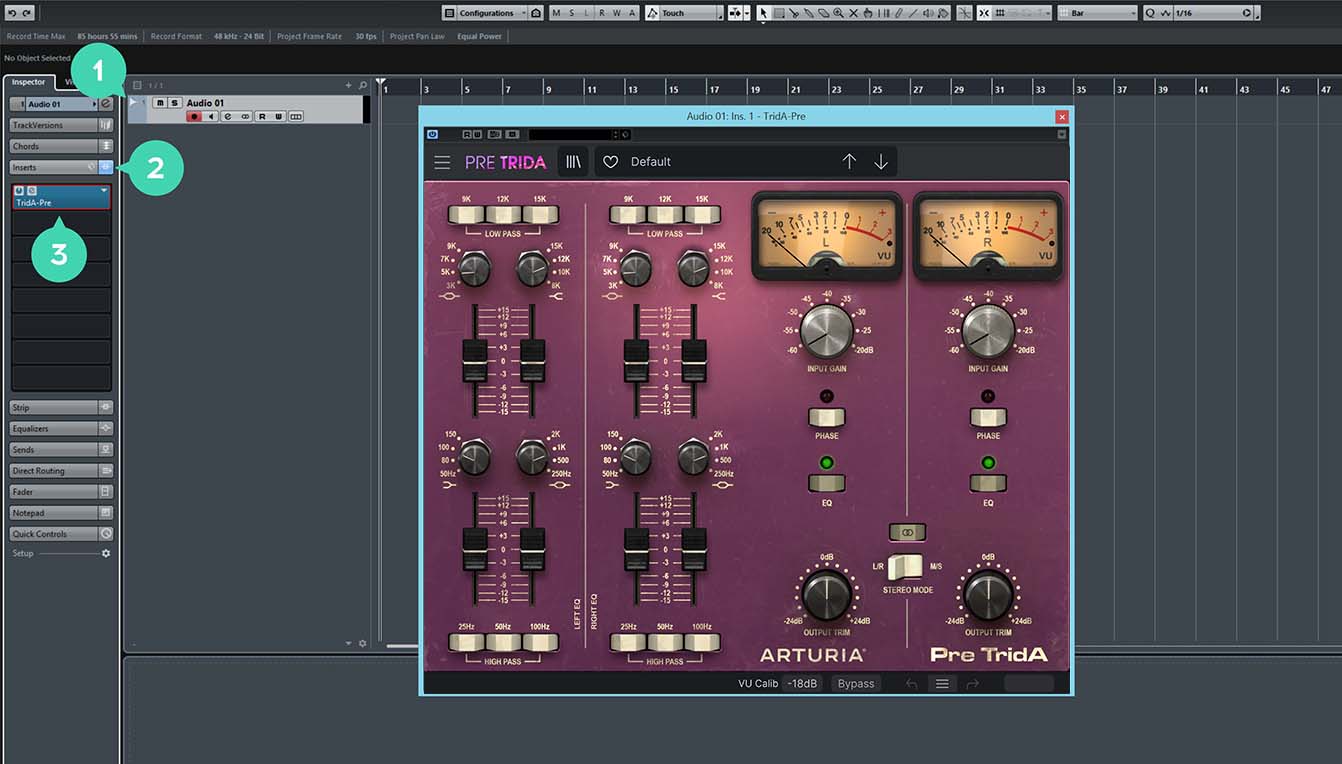
For FL Studio
1/ In FL Studio browser open the Plugin Database folder.
2/ in the Effect section, select the effect of your choice.
3/ Drag & Drop it in one of your mixer effect insert.
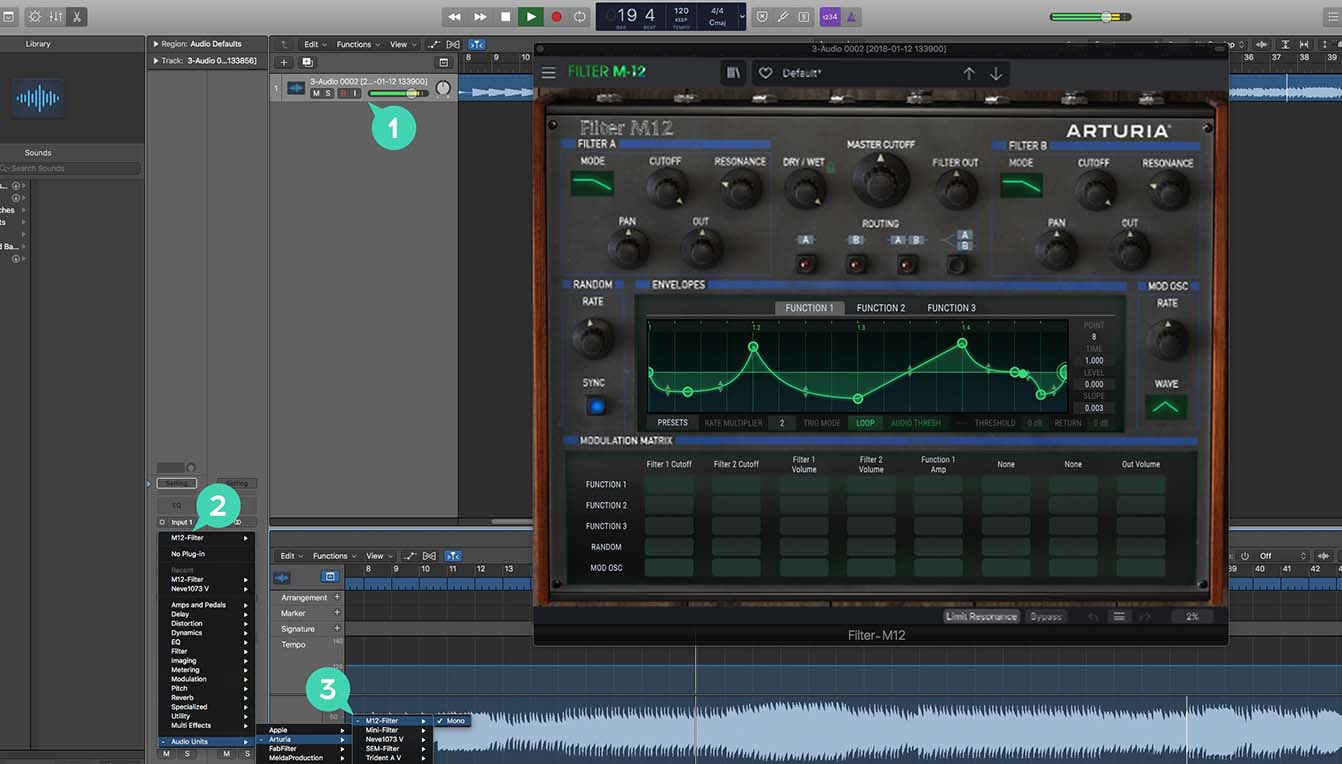
For Logic Pro X
1/ Select a track, or a bus.
2/ Under Settings, EQ & Input, click on the Audio FX tab.
3/ In Audio Units > Arturia > Select the virtual effect your want to add.
More info here
For Pro Tools
1/ Select a Track.
2/ Click on one of the Inserts A-E tabs.
3/ In multichannel plug-in > Effect select the virtual effect of your choice to add it to your insert.
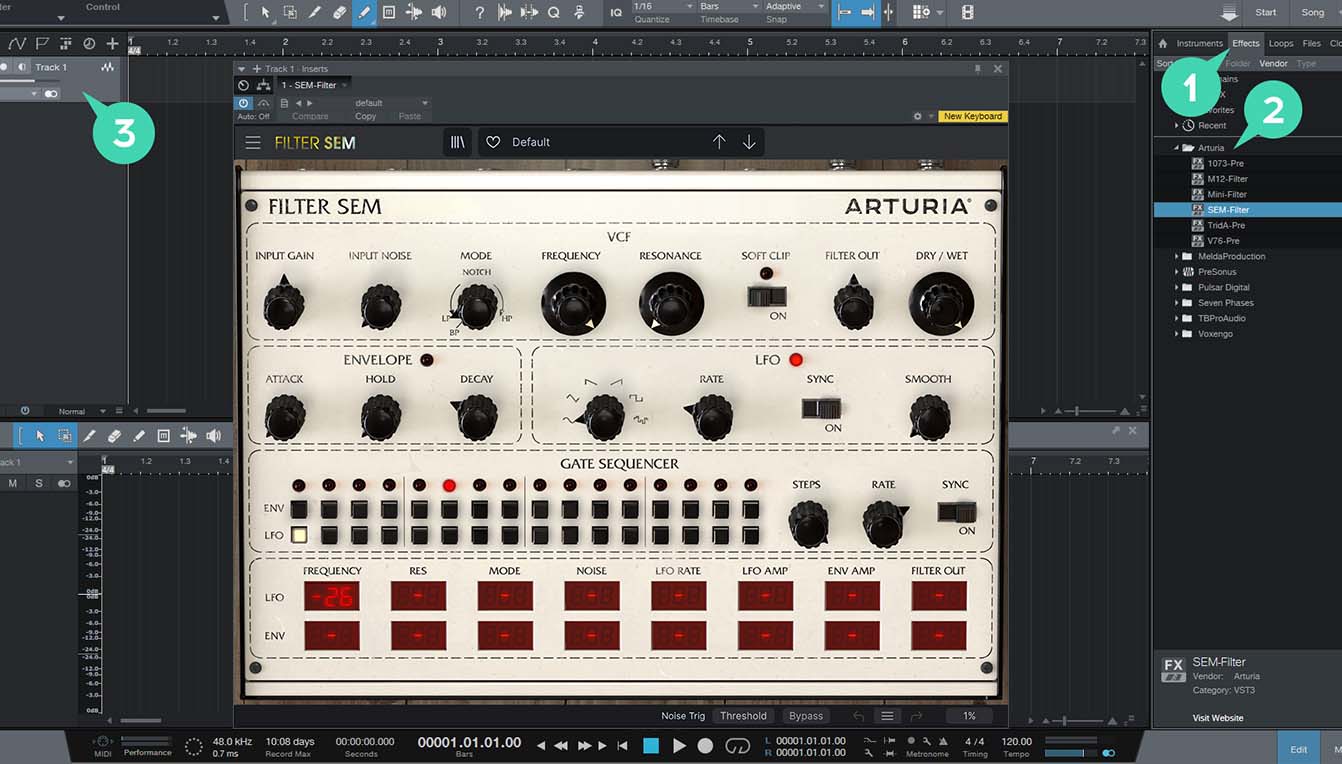
For Studio One
1/ Go the the browser on the right and click the Effects Tab.
2/ Open the Arturia folder and locate the virtual effect your want to use.
3/ Drag & Drop it on your track.
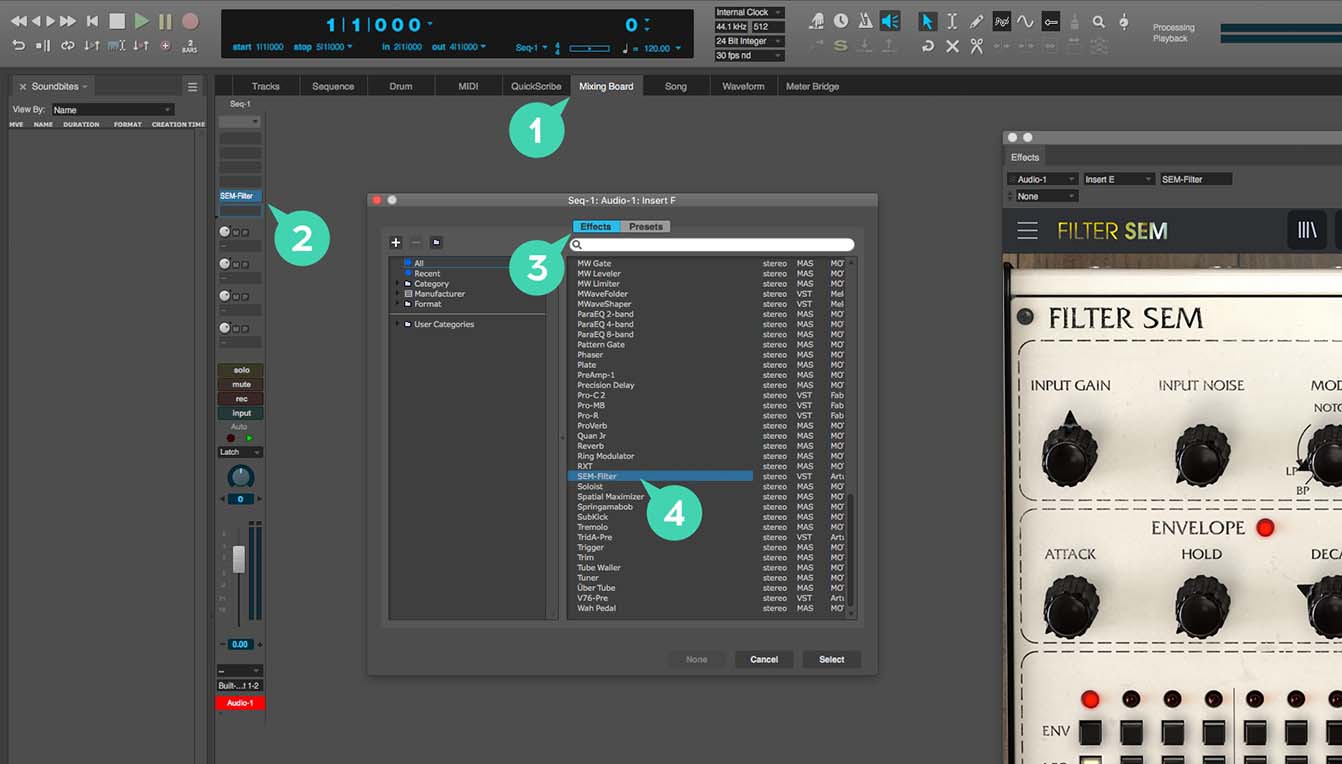
For Digital Performer
1/ Go to the Mixing Board Tab.
2/ Select a track, and on the top of it, click one of the empty inserts slots.
3/ Open the effect Tab.
4/ Select the virtual effect of your choice and click select to add it to your track.
Tutorial
Overview
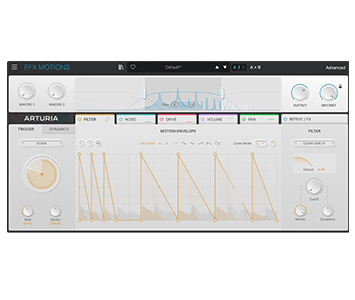
Explore our movement shaper in-depth
In this Overview tutorial, Yetundey explains the basic concepts behind Efx MOTIONS, its structure, various modules, and motion editor. She also showcases a few use cases that might inspire you on how to integrate it into your own projects. Learn how to use Efx Motions to create ducking effects, gated rhythms, abstract filtered loops, as well as stuttered drums fueled by spatial and dynamic effects.
Manuals & Installers
Efx MOTIONS
Manuals
| Name | Date | Size | Version | Download |
|---|---|---|---|---|
Dec 29, 2023 | 18.11 MB | 1.0.1 | ||
Jan 16, 2024 | 18.12 MB | 1.0.0 | ||
Jan 3, 2024 | 18.81 MB | 1.0.0 | ||
Jan 3, 2024 | 18.13 MB | 1.0.0 | ||
Dec 29, 2023 | 18.16 MB | 1.0.0 |
Software
| Platform | Name | Date | Size | Version | Info | Download |
|---|---|---|---|---|---|---|
Jun 6, 2024 | 552.97 MB | 1.1.0.5460 | ||||
Jun 6, 2024 | 401.33 MB | 1.1.0.5460 |
Arturia Software Center
Software
| Platform | Name | Date | Size | Version | Info | Download |
|---|---|---|---|---|---|---|
Apr 23, 2025 | 55.41 MB | 2.10.0.2970 | ||||
Apr 23, 2025 | 29.61 MB | 2.10.0.2970 |
Encore besoin d’aide ?
Notre équipe d’assistance sera ravie de vous aider si vous avez des questions concernant l’utilisation des instruments d’Arturia. Vous pouvez la contacter à partir de cette page :
Demandez de l’aide →