Prise en main rapide
Cette page vous indiquera la marche à suivre pour commencer à profiter de votre produit au plus vite.
1. Téléchargez et installez l’Arturia Software Center (ASC)
L’Arturia Software Center (ASC) vous sert à activer, installer et mettre à jour vos instruments virtuels d’Arturia sur vos ordinateurs.
Vous pourrez accéder aux logiciels que vous possédez, ainsi qu’aux versions d’essai des autres plug-ins d’Arturia.
2. Connectez-vous à l’Arturia Software Center
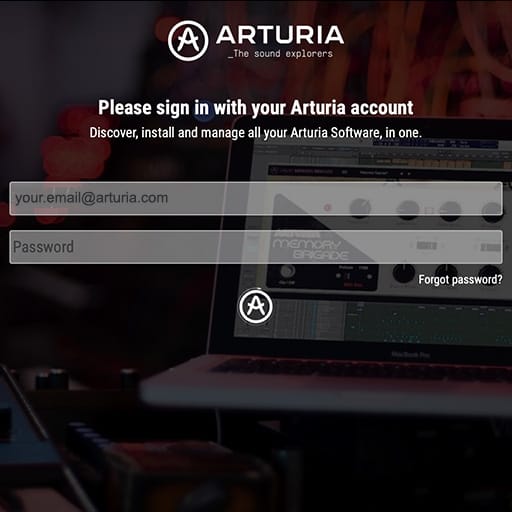
Saisissez la même adresse e-mail et le même mot de passe que vous utilisez pour vous connecter à votre compte My Arturia.
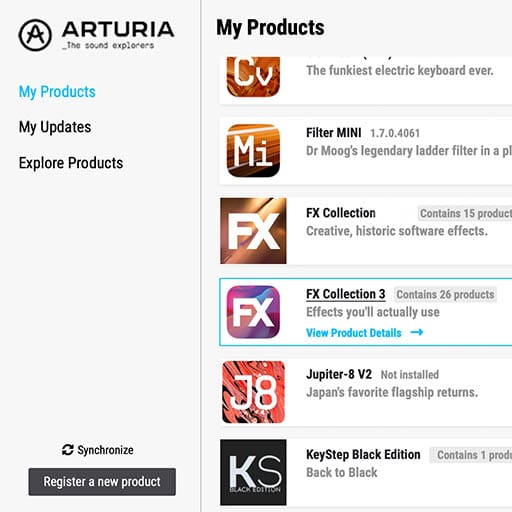
Vous retrouverez ensuite la licence de votre logiciel dans la fenêtre principale.
Si vous ne possédez pas de compte My Arturia, cliquez sur « Créer un compte » et suivez les instructions.
Si vous utilisez un ordinateur hors ligne, veuillez suivre les instructions indiquées dans cet article
Si vous avez acheté votre licence logicielle sur le site Internet d’Arturia, elle sera automatiquement enregistrée dans votre compte. Sinon, cliquez sur le bouton « Enregistrer un nouveau produit » en haut de la fenêtre principale.
3. Installez et activez votre produit dans l'ASC
Trouvez votre logiciel dans la liste et cliquez sur le bouton « Install » pour lancer le processus d’installation en tâche de fond.
Il vous sera demandé, la première fois, de spécifier les répertoires de destination.
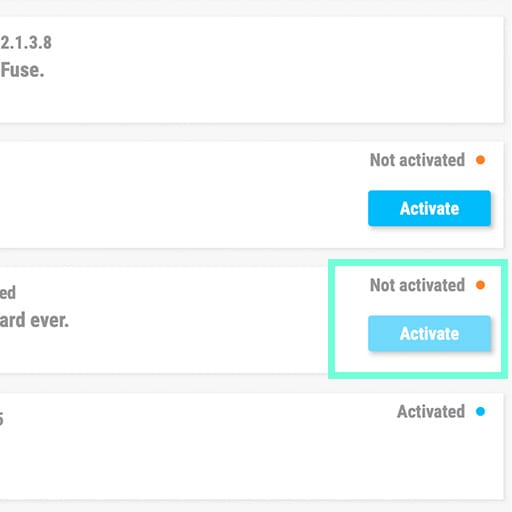
Votre logiciel restera en version d’essai jusqu’à ce que vous l’activiez.
Pour ce faire, cliquez sur le bouton « Activate ». Cela activera votre nouvel effet.
Vous pouvez dorénavant l’utiliser sans restriction sur un maximum de cinq ordinateurs simultanés. Pour ce faire, répétez cette opération sur vos autres ordinateurs.
4. Lancer votre produit
Votre produit n’est pas disponible en tant que logiciel autonome.
Vous devez utiliser un DAW (Station de Travail Audio Numérique) pour vous servir du logiciel.
Cliquez sur les icônes ci-dessous pour comprendre comment utiliser votre nouvel effet dans les DAW les plus utilisés :
Découvrez, expérimentez, et surtout, amusez-vous !
 ABLETON LIVE
 BITWIG
 CUBASE
 FL STUDIO
 LOGIC PRO X
 PRO TOOLS
 STUDIO ONE
 Digital Performer
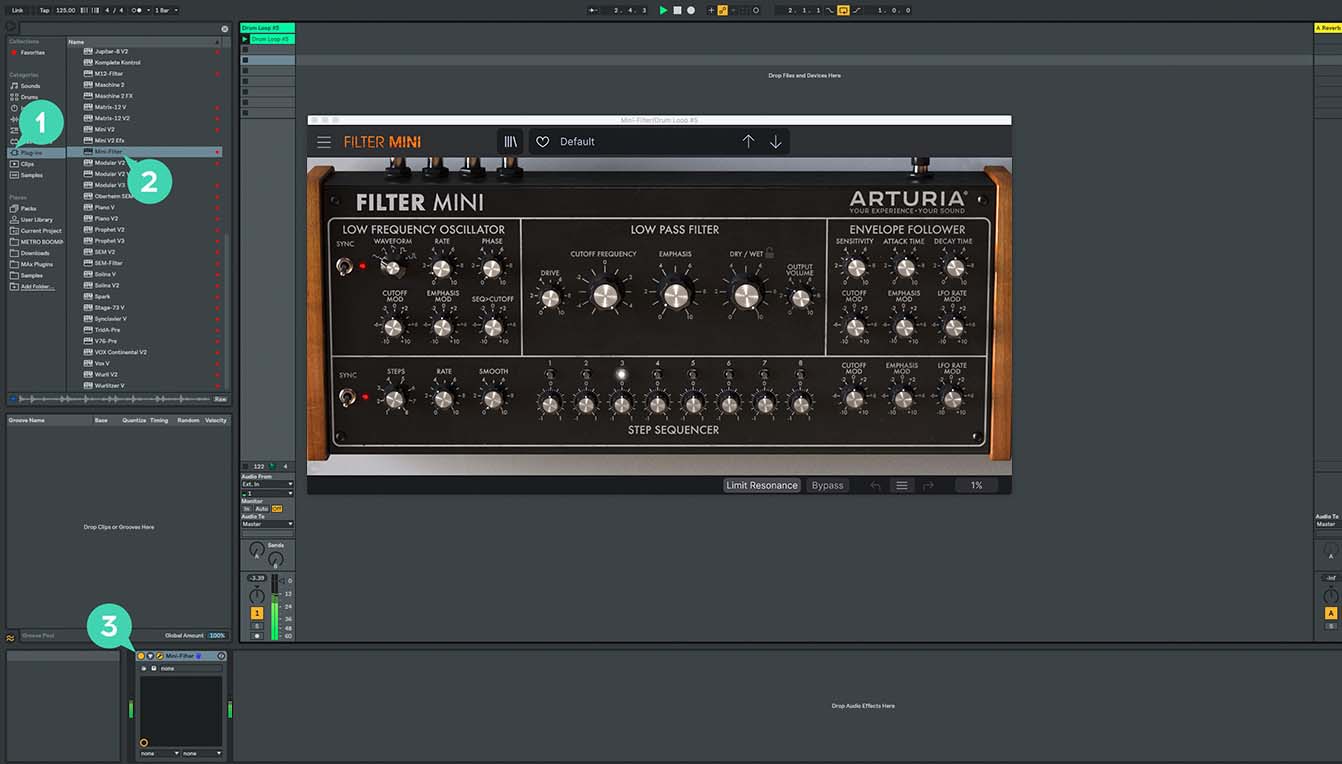
For Ableton Live
1/ Open the Live browser, and click on the 'Plug-ins' section.
2/ In the VST or Audio Unit* folder, browse the virtual effect of your choice.
3/ Drag & drop it in your track or FX return.

For Bitwig
1/ In Bitwig browser, select the devices section and click on the category tab.
2/ Select the Arturia category.
3/ On the bottom of the browser will appear the available Arturia devices.
4/ Drag & drop the virtual effect on your track.
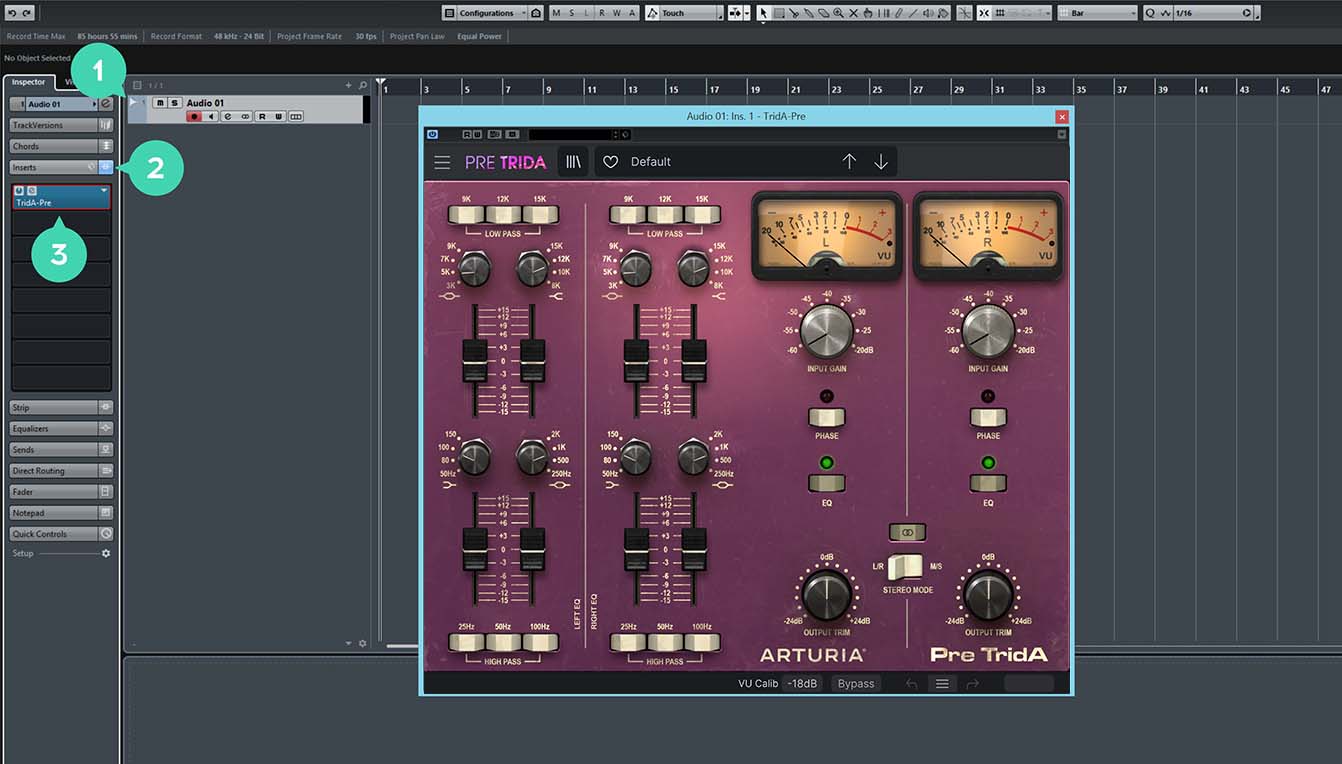
For Cubase
1/ Select a track
2/ In the Inspector, open the Audio Insert tab
3/ Click on an empty slot and select the virtual effect of your choice
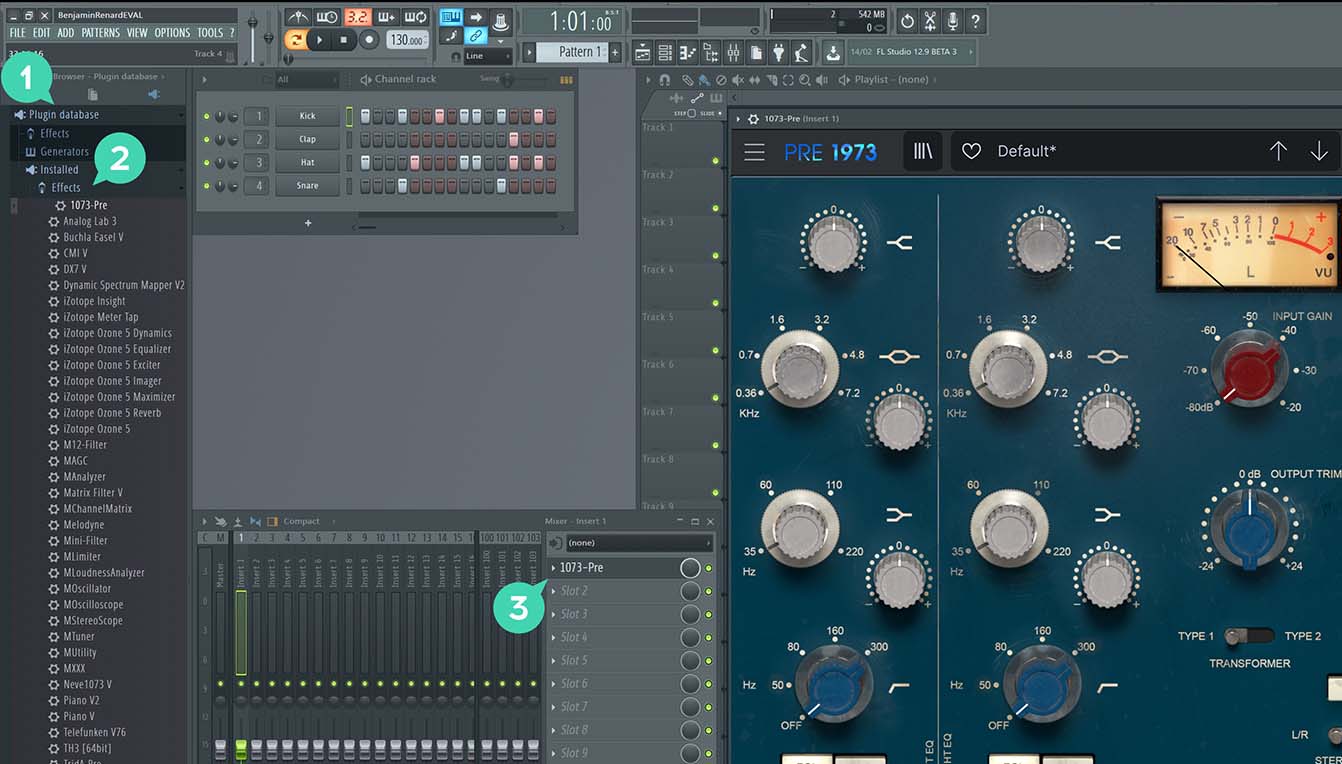
For FL Studio
1/ In FL Studio browser open the Plugin Database folder.
2/ in the Effect section, select the effect of your choice.
3/ Drag & Drop it in one of your mixer effect insert.
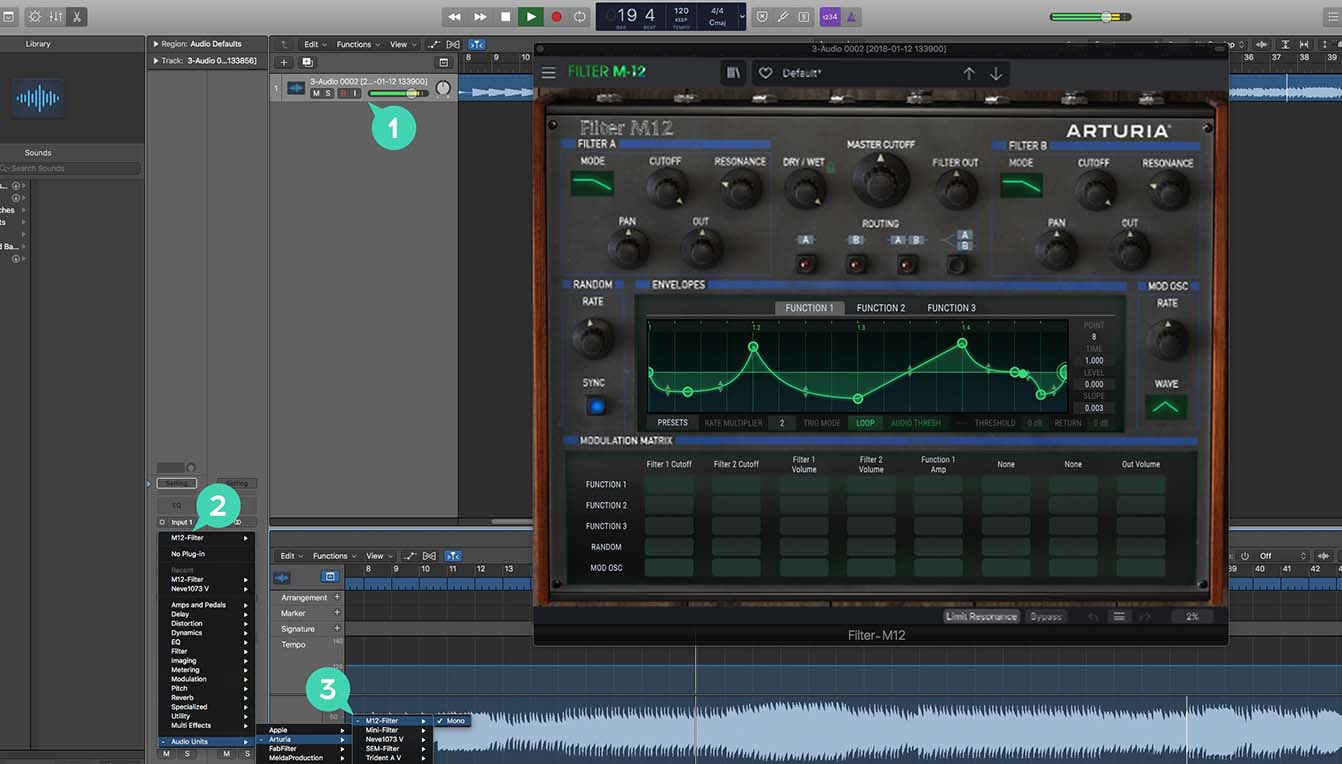
For Logic Pro X
1/ Select a track, or a bus.
2/ Under Settings, EQ & Input, click on the Audio FX tab.
3/ In Audio Units > Arturia > Select the virtual effect your want to add.
More info here
For Pro Tools
1/ Select a Track.
2/ Click on one of the Inserts A-E tabs.
3/ In multichannel plug-in > Effect select the virtual effect of your choice to add it to your insert.
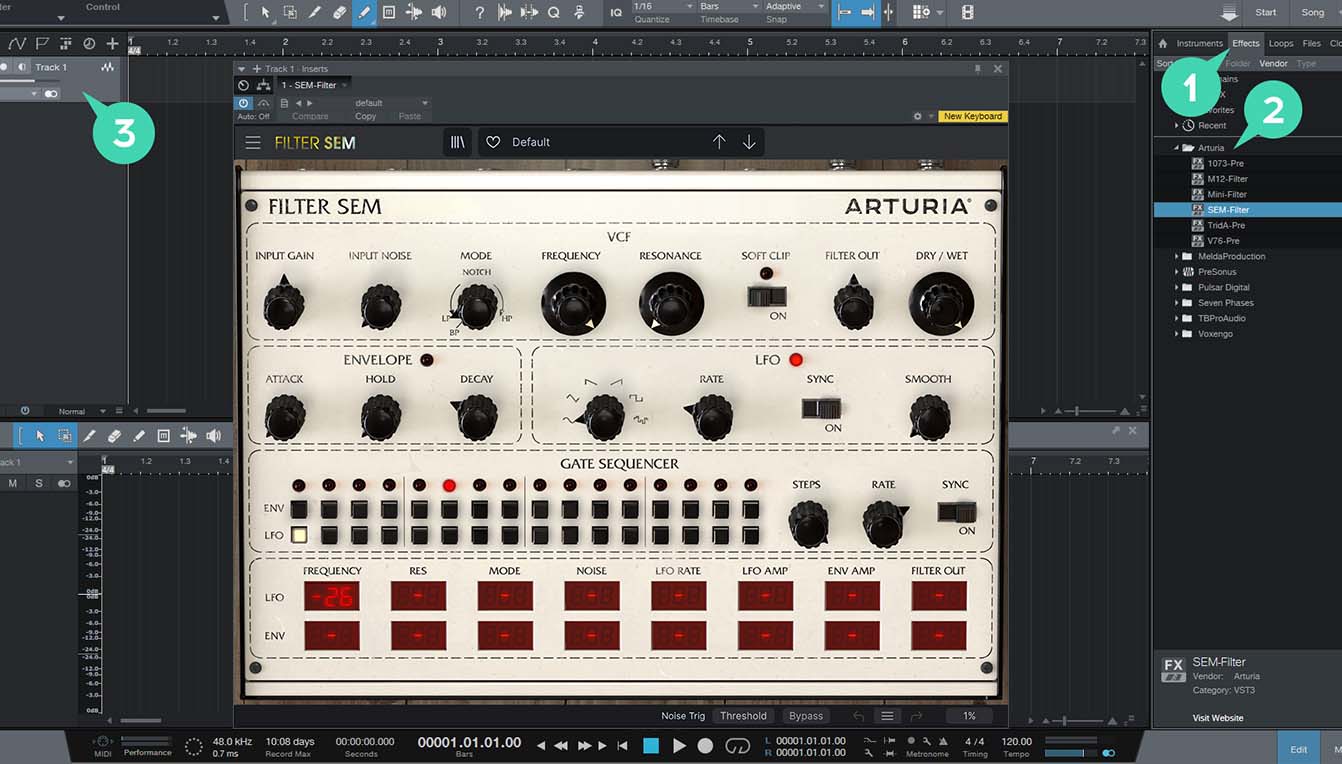
For Studio One
1/ Go the the browser on the right and click the Effects Tab.
2/ Open the Arturia folder and locate the virtual effect your want to use.
3/ Drag & Drop it on your track.
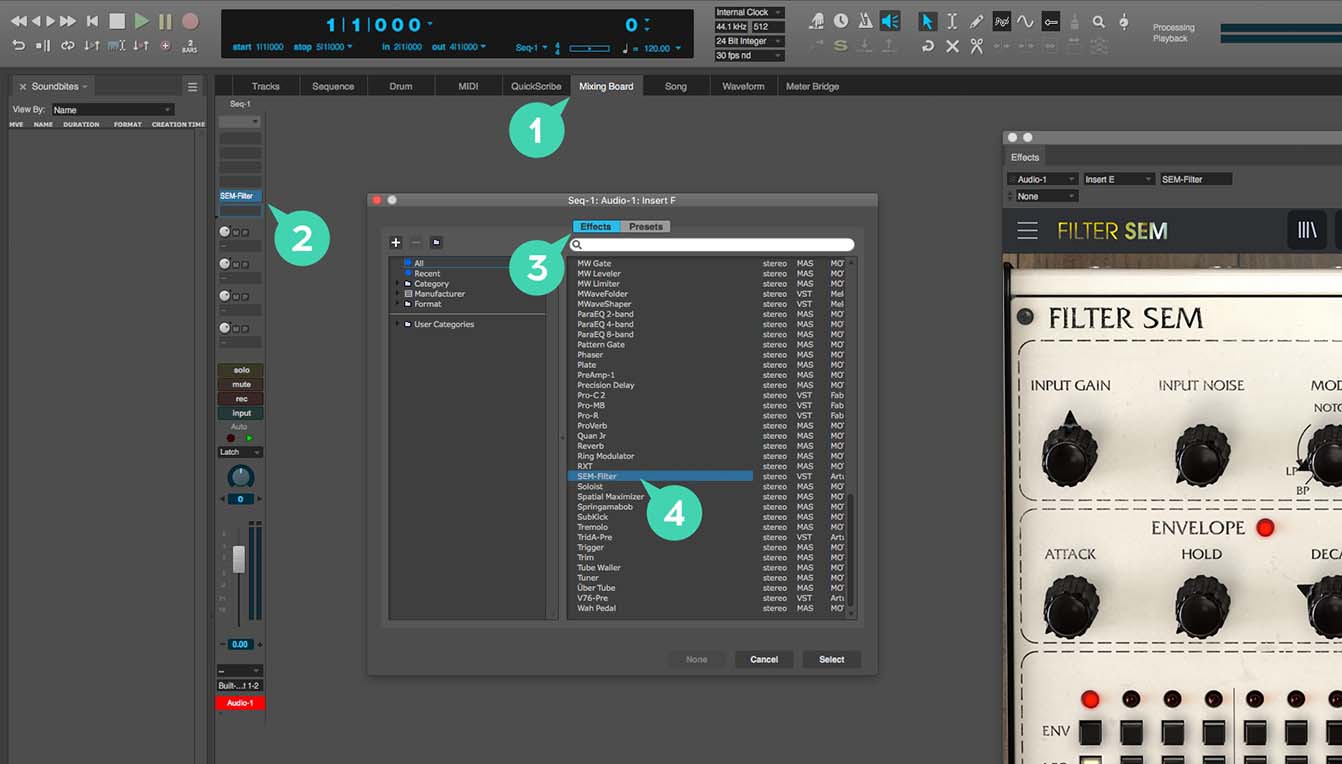
For Digital Performer
1/ Go to the Mixing Board Tab.
2/ Select a track, and on the top of it, click one of the empty inserts slots.
3/ Open the effect Tab.
4/ Select the virtual effect of your choice and click select to add it to your track.
Les tutoriels
1er épisode : présentation
Plongez au cœur de notre Biréacteur de distorsion, et libérez tout son potentiel
Dans ce tutoriel vidéo, Lena vous guide à travers l’interface, les fonctionnalités avancées et la large gamme sonore du Dist COLDFIRE, en vous présentant ses modules flexibles un par un.
Épisode 2 : Comment déformer vos percussions de manière créative
Rendez votre son incandescent en un rien de temps.
En combinant les modes Tube et Waveshaper du Dist COLDFIRE à une modulation créative, Yetundey vous montre comment transformer n’importe quelle boucle de batterie en un motif glitchy et percutant, ajoutant du caractère à n’importe quel mix.
Épisode 3 : Comment créer une basse distordue avec un séquenceur à pas
Transformez des sons familiers en basses grésillantes et percutantes
Yetundey transforme une ligne de basse puissante en un motif rythmique complexe qui se développe et évolue à chaque battement. Dans cette vidéo, elle vous guide à travers le processus.
Fichiers d’installation et modes d’emploi
Dist COLDFIRE

Manuals
| Name | Date | Size | Version | Download |
|---|---|---|---|---|
Sep 20, 2022 | 36.07 MB | 1.0.0 | ||
Sep 16, 2022 | 36.04 MB | 1.0.0 | ||
Sep 16, 2022 | 36.05 MB | 1.0.0 | ||
Sep 14, 2022 | 36.73 MB | 1.0.0 | ||
Aug 19, 2022 | 36.03 MB | 1.0.0 |
Software
| Platform | Name | Date | Size | Version | Info | Download |
|---|---|---|---|---|---|---|
Jun 6, 2024 | 307.73 MB | 1.2.0.5460 | ||||
Jun 6, 2024 | 172.07 MB | 1.2.0.5460 |
Arturia Software Center
Software
| Platform | Name | Date | Size | Version | Info | Download |
|---|---|---|---|---|---|---|
Apr 23, 2025 | 55.41 MB | 2.10.0.2970 | ||||
Apr 23, 2025 | 29.61 MB | 2.10.0.2970 |
Encore besoin d’aide ?
Notre équipe d’assistance sera ravie de vous aider si vous avez des questions concernant l’utilisation des instruments d’Arturia. Vous pouvez la contacter à partir de cette page :
Demandez de l’aide →